Thursday, August 2, 2012

Coin purse is mostly finished and more MOBbings....


MOB on a headband.  For this one, I took two pieces of felt and sewed them together over the headband (AFTER sewing the button on to one of the pieces of felt).  Then it was ready to adorned with tatting. 


I especially like this clear button, because you can really see how the tatting sits behind the button.

\\

It is tatted in my own Tat-ilicious size 40 "My Bleeding Heart"

This little flower doodad is tatted in Tat-ilicious size 40 "Everything Nice"
This "MOB" is again on a piece of felt with a clear button, but this felt circle is sewn to a barrette.
I should have taken a picture of them back... but I will next time.

And, my coin purse is finished. (almost.. I still need to the edging around the flap and add a button) I like it, even if the color looks funny.  Also, I made an error at the very end and had to cut the last few rings.  So when I retatted, I just used Lizbeth gold.  But the color for this project doesn't matter much, because I really just wanted to see if the concept would work.


In all reality you could probably make anything that you would sew in this fashion.  You would just make your fabric out of the split rings and then sew.  It may need a backing if you don't want it to be "meshy" but it would work! :o)

I'm thinking about maybe doing another of these type bags but doing one big sheet of split rings and then doing the sides after the middle section is done. Does that make sense?

Anyway, that's all for tonight, I have some exciting mail to show for tomorrow!
<3

Monday, July 30, 2012

More Tatted MOBs

MOB: Motif on Button
Like it??


This flower was tatted with Tat-ilicious "4-Eva" size 40.


This flower was tatted with size 20 Tat-ilicious "Little Boy Blue" (I will have some at Tat Days!!!!)

Remember this abbreviated Spinning Glass Mat??


Buttons plus tatting (and a progress report on my coin purse)

Do you remember this cute little flower?  

Well,(stepping back in thought a bit)  recently Susie crocheted my some flowers to put on a headband for my baby niece. Here is my niece with the headband, but you can't really see the flower which was super cute. 

Anyway, the special thing about the flower was that there was one button and several flowers that could be traded out on the headband.  
When I got to looking at this flower that I recently showed, I got to thinking that the same thing should work.  
So, the plan now is to tat more flowers to put on this barrette that I made up with a button.  Pretty neat right?


And my coin purse:


I am done with the flap mostly. When I get done with the bag, I think I might do a small edging around the flap to "reinforce" it a bit since I am not regretting only putting one ring on the other side of the button hole.

Here is it lying open.

And... what's a button hold without a button to fill it. :o)


:o( I am a little sad that I wasn't paying attention when I added that picot in the top corner of the flap.  But, once I add a little edging around there... who will really notice?

Oh, and I did switch up colors.  It's actually really funny, because I said I was going to switch color but then I thought it would look funny.  But turns out I missplaced the bobbin that contains the original thread.  Since there was no way that I was going to wait to finish this bag until I found the original color.. I went ahead and picked a different but somewhat similar colorway.  And now, I think it looks funny. lol  It'll be alright though. If the bag turns out well, I plan to make more. :o) I think it would look really neat in two solid colors.


Sunday, July 29, 2012

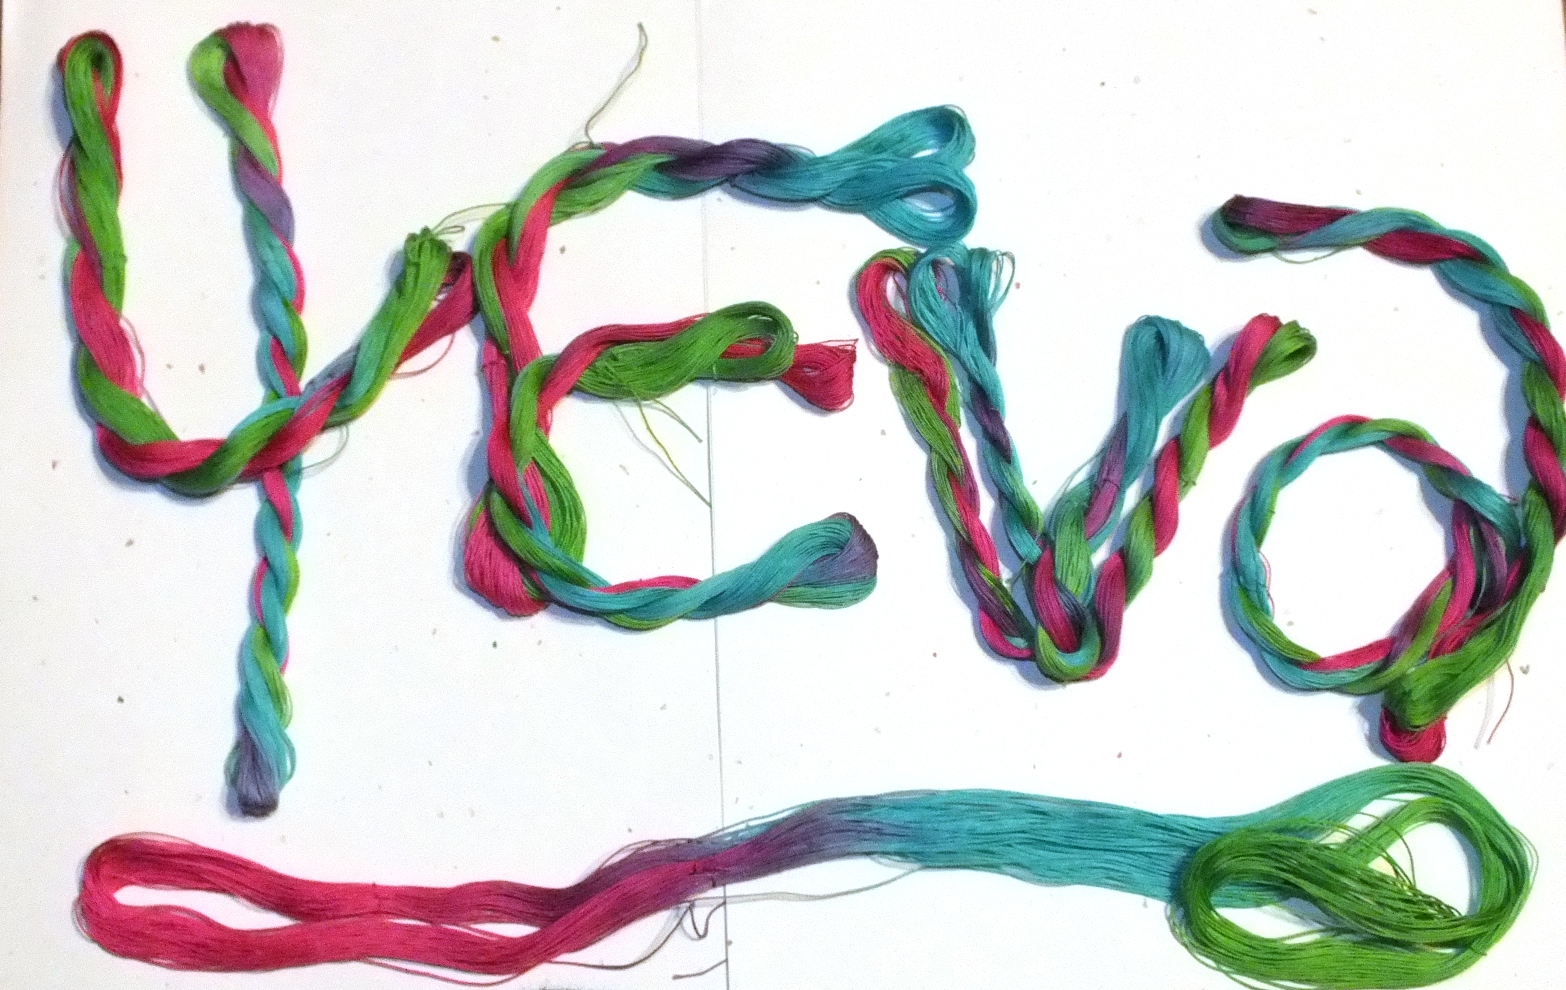
4-Eva!

Now, generally when you see 4eva online, or on your phone, it means forever. Right?
But, not today!
4-Eva, means that this colorway is for Eva.  (but I have also stocked a few skeins in the shop as well)
Here lately I've been talking about how I might go out of town to see a relative of Chris's.
Well, it ended up that we didn't have the money to go, which I was really bummed about.  I was bummed because we were going to be Diane's neck of the woods and I had already been trying to make plans to meet up with her while I was going to be there.
Not only that, but I was going be able to meet Diane's daughter and granddaughter.  So, since I was not able to meet with them, I decided to dye up a special batch of thread for the young tatter Eva, (Diane's granddaughter).  So, once I was told that Ms. Eva's favorite colors are pink, blue, and green... I got to work :o)

And this the result:


Pretty, right?  

So, I will be sending Ms. Eva and Mrs. Diane a skein each.  But, really I wish they were tatting with me rather than just my thread, but this will just have to do for now until I can actually make the trip up there. 

:o)

Saturday, July 28, 2012

Tooth Fairy Time!!!


My baby's sweet semi-toothless smile.  And a small glimpse of me as a reflection.


See?  Didn't I mention a time or two that I was not good at sewing??
Livi had some old tights, so I cut the foot off of them.  I then sewed on a little pocket for her tooth to go in and then attempted to sew up the bottom so that it would look like a tooth.  
As you can see, we also made the tooth fairy a small necklace.  This was made simply out of a hair tie and a pendant that I just happened to have around. And of course, the small, teeny tiny white thing is my baby's first lost baby tooth.  **tear!** 

:o)


I'm getting pretty far on my coin purse.  I am (almost) half way through and have completed half of the flap. 
Of course, I am getting a little tired of the colors, so I think I will choose a different colorway for the second half.  I'll try to make sure they atleast look semi decent together though :o) 

Working on a coin purse...


So, the mood struck the other day to start a coin purse. I have started in one corner and went down with one row.  Then when I felt it was long enough, I made a small split ring for the bottom and then started on the backside while attaching the split ring to split rings of the front side.  Once I had tatted the first row, I just did a "lopsided" split ring to start the next row. 

It's going to take me a while to get it the size I want, but I like how it is looking so far!  As you can see, and as I have already kind of revealed:  It's is made up entirely of split rings. :o)

Also, once I feel that I am about at the half way point for this purse, I will start making one side much longer than the other so that there can a flap.  I am also considering not attaching some of the split rings on the flap for the purpose of a button hole.  That should be interesting.  I do not plan to attach the button to the tatting itself.  That' seems like it would be too rough on it.  Instead, I will attach it to something behind the tatting, if that makes sense. :o)

The thread is size 40, some that I dyed up.

I am still dyeing but I've made the executive decision to keep the my progress under wraps so that I can ensure that I do well and have enough stock to offer at Tat Days in September.  It was a hard decision to make, but it was a necessary one. 

However, I will be doing a special batch tomorrow that will be going into my Etsy shop early next week.


Wednesday, July 25, 2012

Starting the new challenge with "Stardust"

Really, I don't actually think the thread looks very much like "Stardust" but when I was trying to think of a name for it.. all I could think was that it reminded me of the speckled paper that I use to create the envelopes for my packages.  If you have gotten a package from me that was made from speckled white paper, then you know what I am talking about.
But if not, here's a pic:
So, the paper just so happens to be called "Stardust".  I "dyed" this thread quite a while back, but didn't give it much thought until recently. And really, I only dyed three skeins of size 20 and one of those I have kept for myself.  Anyway, I say "dye" because the way this was dyed was by taking dry powder dye and lightly brushing it around the wet thread.  That way, only small flecks of dye got on the thread.  This means that the different colors that are in the mix of gray that I used were separated.  That's what causes this effect:


Looks pretty cool if you ask me.   It's no work of art, but it's fun. 

This is what it looks like worked up:

(1/25) 
This little flower was tatted with Size 20 "Stardust"
I guess you could call it a "doodle" or just a playing around motif. 
I like it.

The abbreviated pattern is 
Round 1
Ring  6+3-3
Chain 5+5+ 
Round 2
Chain +8+8
Round 3
Chain +12-4+4+12+